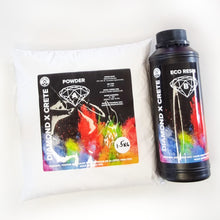
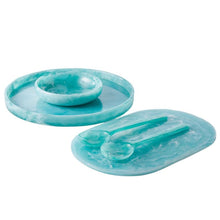
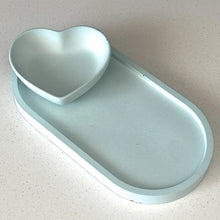
Diamond X Crete Powder is the common name for the mineral calcium sulfate, which has a chemical formula CaSO4. It bonds easily with water and is usually found in its natural state as hydrated calcium sulfate, with a chemical formula of CaSO4.2H20. It is a soft mineral that usually appears white or grey and is composed of translucent crystals. It's deposits are found as sediment in areas that were once covered by water. When rock gypsum is heated, it releases the water molecules bonded to it, and the resulting product is anhydrous powder, a dry powder.
How is it different from Epoxy Resin?
• Composition - Diamond X Crete is a water-based eco resin compound, free from harmful chemicals, whilst epoxy resin is chemical-based.
• Safety and Eco-Friendliness - Diamond X Crete has zero VOCs and is BPA-free, odor-free, and non-flammable, making it safer and more eco-friendly than epoxy resin.
• Ease of Use - Diamond X Crete is user-friendly and accessible, ideal for beginners, and safe for use around children, unlike traditional resin, which requires careful handling and protective gear.
• Curing Time - Diamond X Crete cures in just 15- 30 minutes, offering a quick turnaround for projects, whereas epoxy resin typically requires at least 24 hours to cure.
• Durability - Despite its quick curing time, Diamond X Crete maintains a durable, porcelain-smooth finish – comparable to epoxy resin.
Consumables required for Crafting:
For crafting with the Diamond X Crete, crafters will need to provide a few additional items:
• Scale - A digital scale for accurate measurement of Diamond X Crete powder and eco resin. The ratio is 3:1 AB or 100:33 AB by weight
• Cleaning Supplies - These are required to clean up as you go along with crafting . • Protective Work Surface: A cover to protect the work area from spills or drips.
• Mixing Bowls or Additional Cups - If larger quantities or multiple colors are being mixed at once. Small disposable cups work great.
• Mask - We work with so many dusty materials and powders, so we wear N95 masks when handling these products. Diamond X Crete is non-toxic, but the powder gets in the air as you measure it. A mask is a good idea. One can also use nitrile gloves to prevent hands getting messy.
Step-by-step instructions:
Preparing your work area:
• Choose the right location - Work in a well-lit, ventilated area with a flat, stable surface away from direct sunlight. The flat surface is important. You don’t want to move the mold once the Diamond X Crete is poured.
• Protect your surface - Use a plastic sheet, old newspapers, or a disposable tablecloth to cover the work area and facilitate easy cleanup.
• Organize tools and materials - Arrange the Diamond X Crete kit, consumables and any additional decorative items within easy reach. Once you mix the product, you have limited time around 8 minutes to get the pour done.
• Wear protective gear - Gloves are recommended to keep hands clean and protect skin. As mentioned, we like wearing a mask when measuring the powder. Once the water is added, we take off the mask. We found this to be a neat and tidy craft, but it’s probably a good idea to wear clothing that’s not too precious.
• Prepare for mixing - Have a digital scale ready for accurate measurement. Also plan your mixing and ensure the correct cups are set out including your mixing sticks so that precious time is not wasted once the powder and resin is mixed.
• Safety considerations - Keep a waste bin and cleaning supplies like paper towels close by, especially if working around children or pets.
• Mind the temperature - Ensure the workspace is at a comfortable room temperature for optimal Diamond X Crete curing. Not too cold or hot.
Measuring & mixing Eco Resin:
Getting the mix right is crucial for successful Diamond X Crete crafting. Here’s a straightforward guide to measuring and mixing the powder and eco resin.
• Accurate measurement - Use a digital scale to measure the Diamond X Crete powder and eco resin. The correct ratio is essential for the mixture to set properly. Typically, the ratio is 100:33 by weight (Diamond X Crete powder to eco resin). For example, we mixed 100 grams of powder with 33 grams of eco resin.
• Start with the powder - First, measure the required amount of Diamond X Crete powder and pour it into a mixing cup.
Add Eco Resin - Next, shake the eco resin bottle well then measure the eco resin in a separate cup. Add it to the powder or vice versa. It is not necessary to add it slowly or in a specific format as Diamond X Crete is a superior meshed formula and will nor create lumps.
• Mix thoroughly - Use the stirring stick to mix the powder and eco resin. Stir for about 60 seconds or until the mixture is smooth. Be sure to scrap the nooks and crannies of the mixing cup. You will have approximately 6-8 minutes pot-life as a safety measure and up to 10 minutes when mixing larger quantities , however to be safe stick to the 6-8 minutes as conditions vary in different areas of use.
• Add pigments (optional) - Now is the time to add the pigments. Mix the pigment thoroughly into the blend to ensure an even color distribution. Or you can undermix the pigment to create a marbled effect. A good rule of thumb is 2% of pigment to Diamond X Crete Mixture however different pigment suppliers will have variable concentrated pigments so play around to get the correct undertones.
• Check consistency - The final mixture should be smooth and pourable. If it’s too thick, add more water; if too thin, add more powder. However, if you follow the recommended ratio, the viscosity should be perfect.
• Work quickly - Remember, Diamond X Crete starts setting quickly. Once mixed, you have about 6-8 minutes of working time, so prepare your molds and supplies beforehand.
• Avoid air bubbles - While pouring the mixture into molds, do it slowly and steadily to minimize the formation of air bubbles. Gently tap (very gently) the mold if appropriate. Our Eco resin is formulated with self-degassing agent to release the bubbles super-fast. If pouring over a 3D object, it’s best to pour a layer of resin, carefully add the object, and then finish pouring to cover. If you pour right over the object, there’s a risk of getting an air bubble on the backside.
• Clean up immediately - After pouring, clean your mixing tools with water. This makes it easier to reuse them for future projects. If the product dries, you can soak it in warm, soapy water to loosen it. Our experience is that the dried product flakes off most surfaces.
Demolding time:
• Wait for complete curing - Ensure the Diamond X Crete has fully set before attempting to demold. This usually takes about 30 minutes, but thicker pieces may require more time. However it is also advisable if using full color tones to demold after 20 minutes as the heat generated during initial curing releases water moisture in the mold thus staining the color and giving a water droplet effect.
• Gentle demolding - Start by gently pulling the edges of the mold away from the Diamond X Crete. Carefully flex or twist the mold if it’s flexible, to loosen the piece. Then, slowly push the item out from the bottom.
Tips & tricks for working with Eco Resin:
Working time:
• Know the time frame - Diamond X Crete begins to set quickly. Typically, you have about 6-8 minutes of working time once it’s mixed. Plan your steps accordingly. It helps to set a timer.
• Preparation is crucial - Have all your materials, tools, and molds ready before you start mixing. This ensures you can work efficiently within the limited time frame.
• Mix in batches - If you’re working on a larger project or multiple pieces, consider mixing Diamond X Crete in smaller batches to avoid premature setting.
• Monitor temperature - Room temperature can affect the setting time. Cooler temperatures may extend your working time slightly, while warmer temperatures can shorten it.
• Speed and efficiency - Develop a rhythm in your work – mix quickly but thoroughly, add pigments promptly, and pour into molds as soon as the mixture is ready.
• Avoid distractions - Minimize interruptions during your crafting session. This helps in utilizing the working time effectively without the mixture setting prematurely.
• Practice makes perfect - The more you work with Diamond X Crete , the better you’ll become at managing the working time. Don’t be discouraged by initial challenges; each project is a learning opportunity.
Setting time:
• Understand the typical setting time - Diamond X Crete generally sets within 15-20 minutes. This can vary based on the pour’s thickness and your workspace’s ambient temperature.
• Thickness matters - Thicker pours may require a longer setting time. Allow ample time for the X Crete to solidify completely before demolding.
• Check for complete curing - Before demolding, gently touch the surface of the Resin Crete in the mold. It should feel firm and not tacky. Give it more time to set if it’s still soft or sticky. I would avoid the touch test if possible because you’ll leave a fingerprint if it hasn’t hardened.
• Temperature effects - Higher temperatures can accelerate the setting time, while cooler temperatures can slow it down. Work in a stable, room-temperature environment for consistent results.
• Avoid moving the molds - Once you’ve poured the X Crete, keep the molds still and undisturbed during the setting time to prevent any deformities or imperfections.
• Patience is key - Resist the urge to demold early. Giving the X Crete enough time to set properly ensures that your creation maintains its shape and surface details.
• Post-setting handling - Even after demolding, handle your creations with care. They continue to harden and reach their full strength over the next few hours to days.
Sealing / Waterproofing:
Sealing and waterproofing are important steps in finishing your X Crete projects, especially for items that may come into contact with moisture.
• Choose the right sealant - Select a sealant that is compatible with X Crete. Clear acrylic sealers or epoxy resin coatings are good options for a durable and waterproof finish.
• Clean before sealing - Ensure your X Crete creation is completely clean and dry before applying any sealant. Dust or moisture on the surface can affect the sealant’s adhesion and finish.
• Apply thin layers - Apply the sealant in thin, even layers. Thick layers may take longer to dry, resulting in an uneven finish. Multiple thin layers often yield the best results.
• Use the right tools - Apply the sealant with a soft brush or a sponge Avoid using materials that may leave streaks or lint.
• Drying time - Allow each layer of sealant to dry completely before applying the next. Refer to the sealant’s instructions for specific drying times.
• Waterproofing test - After the final layer of sealant has dried, you can test the waterproofing by placing a small amount of water on the surface. The water should bead up and not soak into the X Crete.
• Regular maintenance - If your sealed X Crete item is used frequently, especially in high-moisture environments, it may need resealing over time to maintain its waterproof properties.
• Ventilation - Work in a well-ventilated area when applying sealants, especially if they contain strong fumes.
• Safety precautions - Wear gloves and protective eyewear when working with sealants to protect your skin and eyes